A Guide to staking trees
There’s nothing quite like the pride of planting a new tree in your garden. You’ve picked the perfect spot, dug the hole, and visualised the shade it will provide in a decade’s time. But before you head inside for a well-earned cuppa, there is one crucial task left: staking.
Proper staking is essential for helping a young tree establish its roots. Here is how to do it properly using tree stakes and ties.
What you’ll need:
Before you start, make sure you have the right kit. Using “make-do” materials like garden twine or old wire can actually damage the bark and do more harm than good.
- Tree Stakes: Usually pressure-treated timber. For most garden trees, a 1.2-metre stake is sufficient.
- Tree Ties: Look for adjustable rubber or plastic ties with a spacer (this prevents the tree from rubbing against the stake).
- A Heavy Mallet: To drive the stake into the ground.
- A Hand Saw: (Optional) to trim the stake to the correct height.
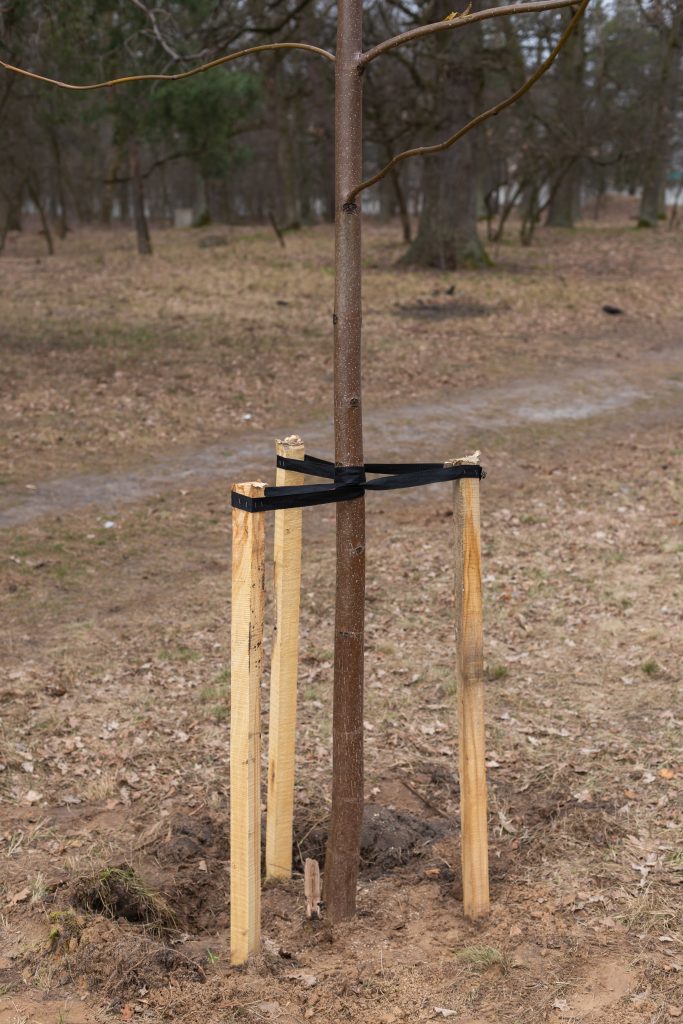
Step 1: Choosing Your Method
Depending on the size of your tree and the root ball, you generally have two options:
- The Single Stake: Ideal for smaller trees. The stake is driven in at a 45-degree angle to avoid piercing the root ball.
- The Double Stake: Best for larger “standard” trees. Two stakes are driven in vertically on either side of the root ball, with a timber crossbar or two separate ties.
Step 2: Position for Success
In the UK, our prevailing winds usually come from the south-west. To give your tree the best support, place your stake on the windward side. This allows the wind to blow the tree away from the stake rather than onto it, reducing the risk of the trunk rubbing against the wood.
Step 3: Drive it Home
- Place the stake about 5–10cm away from the trunk.
- Using your mallet, drive the stake into the ground until it feels solid—usually about 30–40cm deep.
- The Golden Rule: The stake should only reach about one-third of the height of the tree. We want the top of the tree to move in the breeze, as this movement encourages the trunk to thicken and grow strong.
Step 4: Secure the Tree Ties
This is where many gardeners go wrong. You aren’t trying to buckle the tree into a seatbelt; you’re giving it a flexible support system.
- Thread the tie: Wrap the tie around the tree and the stake.
- Use the spacer: Ensure the rubber spacer sits firmly between the tree and the stake to prevent chafing.
- Check the tension: The tie should be firm enough to prevent the tree from flopping, but loose enough to allow for a little “wiggle room.”
Maintenance: Don’t Set and Forget
A tree tie left unchecked for two years can become a noose. As the tree grows, the trunk expands; if the tie isn’t loosened, it will “girdle” the tree, cutting off the flow of nutrients.
Pro Tip: Check your ties every autumn and spring. Give them a quick wiggle to ensure there is still room for growth. After about two years, the roots should be established enough that you can remove the stakes entirely.